Summer afternoons in my grandmother’s kitchen were magical. The smell of baking cherry desserts filled the air. It made every day feel special.
Those Cherry Pie Bars were more than a treat. They connected us to family, love, and tradition.
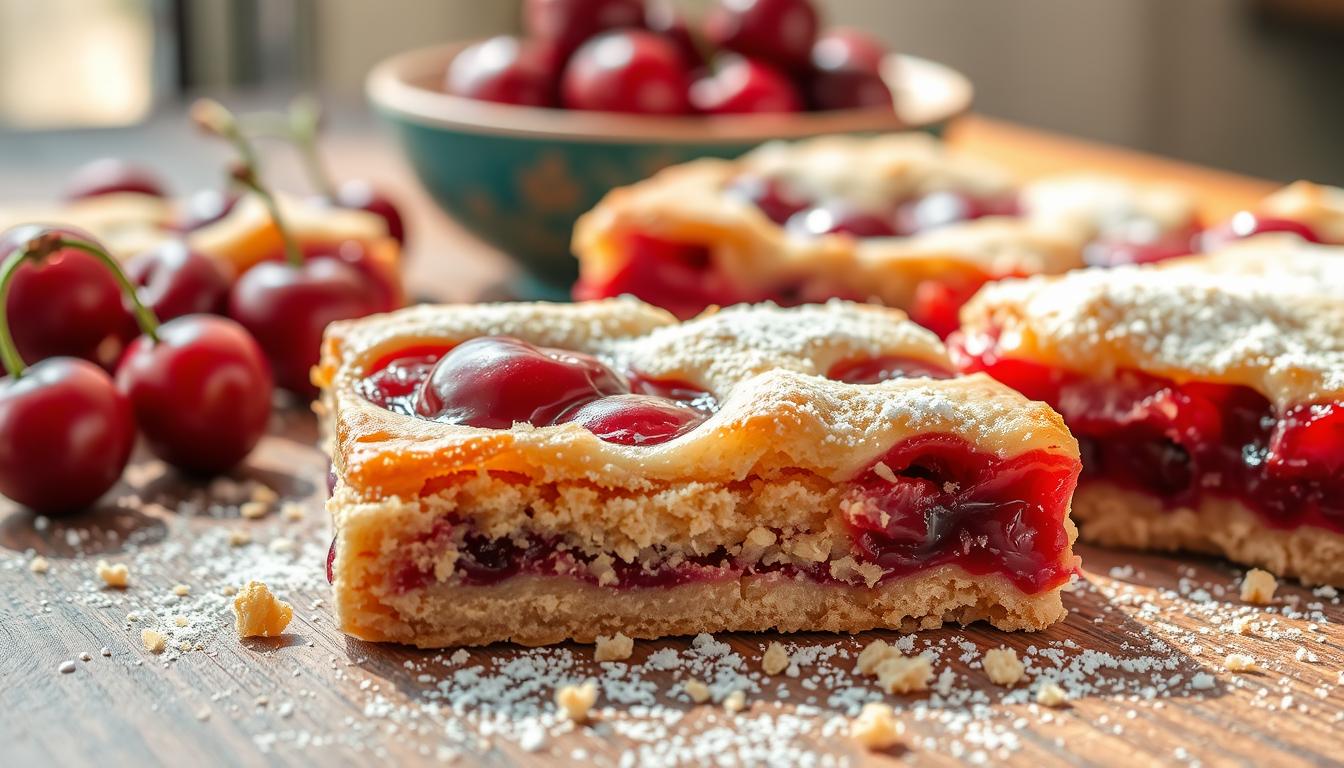
Now, I’m excited to share an easy cherry bar recipe. It brings back those warm memories. The recipe combines a buttery shortbread base with a sweet-tart cherry filling.
It’s simple to make and tastes amazing. You can make it in just 30 minutes. It’s perfect for any gathering.
These Cherry Pie Bars are easy to make, no matter your baking skills. They’re great for potlucks, family gatherings, or just when you want something sweet. Get ready to make a dessert that will become a favorite in your home.
Why These Cherry Pie Bars Will Become Your Go-To Dessert
Discover the magic of homemade cherry bars that will change your dessert game. These fruit bar recipes are more than just a sweet treat. They’re a game-changer for home bakers and dessert lovers alike.

Imagine making a delicious dessert that wows everyone without taking hours. Cherry pie bars are your secret weapon for quick and delightful treats that never disappoint.
Time-Saving Benefits
Busy home bakers will love these cherry crumble bars for their incredible efficiency. With just 15 minutes of preparation and 30-35 minutes of baking, you can have a mouthwatering dessert ready in under an hour.
- Total preparation time: 45-50 minutes
- Serves 16 people
- Easy cleanup
- Minimal ingredients required
Crowd-Pleasing Appeal
Your homemade cherry bars will be the star of any gathering. Their portable nature makes them perfect for potlucks, family reunions, and casual get-togethers. Each bar delivers a burst of fruity flavor that guests will love.
Year-Round Availability
One of the best features of these fruit bar recipes is their versatility. Using canned cherry pie filling means you can enjoy these delightful bars any time of year, regardless of fresh cherry availability.
With just a few simple ingredients and minimal effort, you’ll create a dessert that looks and tastes like it came from a professional bakery. Get ready to become the dessert hero in your social circle!
Essential Ingredients for Perfect Cherry Pie Bars

Making tasty cherry hand pies or squares starts with picking the right ingredients. Your baking success depends on using top-notch components. These ingredients should work together to create a delicious dessert.
Here are the key ingredients you’ll need for your cherry pie bars:
- Butter: ½ cup of unsalted butter for a rich, tender base
- Sugar: 1 cup to provide sweetness and help with caramelization
- Eggs: 2 large eggs for binding and structure
- Vanilla extract: 1 teaspoon for depth of flavor
- All-purpose flour: 2 cups for the perfect shortbread crust
- Salt: A pinch to balance the sweetness
- Cherry pie filling: 1 can (21 oz) of high-quality filling
When picking your ingredients, choose fresh, premium products. The quality of butter and extracts can greatly impact your cherry pie squares. Fresh eggs and pure vanilla extract will make your dessert taste better.
Pro tip: If you’re looking to accommodate dietary restrictions, consider gluten-free flour alternatives or dairy-free butter substitutes. These can help you create delicious cherry hand pies that everyone can enjoy.
Making the Buttery Shortbread Base
Starting your cherry pastry treats with a shortbread base is key. This layer is the foundation for your cherry delights. It offers a rich, crumbly texture that pairs well with the fruity filling.
Mixing Techniques for Perfect Texture
Getting the shortbread base right is all about mixing. Here’s how to mix for the perfect texture:
- Use room temperature butter for smooth creaming
- Cream butter and sugar until light and fluffy
- Add eggs one at a time, mixing thoroughly
- Gently fold in dry ingredients to avoid overmixing
Pan Preparation Tips
Prepping your pan right ensures your cherry pie bars come out perfectly:
- Use an 8×8 inch baking pan
- Line the pan with parchment paper
- Leave an overhang for easy removal
- Lightly grease the exposed sides
Achieving the Perfect Texture
Your shortbread base should be tender yet sturdy. The secret is in the precise measurements and technique. Use 2 cups of all-purpose flour, 1 cup of salted butter, and ½ cup of granulated sugar. Press the mixture gently into the pan, creating an even layer that will support your cherry filling.
Bake the crust at 300°F for 20 minutes until it’s just turning golden. This initial baking creates a solid foundation for your cherry pastry treats that will make every bite absolutely irresistible.
Cherry Pie Filling Selection and Preparation
Making tasty Cherry Pie Bars begins with picking the right cherry pie filling. You can go for homemade or use canned filling for ease and flavor. Canned filling is a great choice for consistent taste in your desserts.
- Look for high-quality brands like Market Pantry from Target
- Select a 21 oz can for optimal volume
- Check for natural cherry flavor and minimal added sugars
If you want a personal touch, making your own cherry pie filling can make your bars special. Here’s a quick guide:
- Use 5 to 6 cups of sour cherries (approximately 1125g to 1350g)
- Add 3/4 cup (149g) of sugar
- Use 6 tablespoons of Instant ClearJel for thickening
Pro tip: If using fresh cherries, pit them carefully to keep the filling smooth. Frozen cherries are also good – just thaw and drain before using.
Whether you make your own or use canned, spread the filling evenly on your shortbread base. This way, every bite of your Cherry Pie Bars will be full of cherry flavor.
Creating the Perfect Crumble Topping
The crumble topping makes your easy cherry bar recipe stand out. It adds texture, looks great, and has that golden-brown finish everyone loves.
Mastering the Crumble Texture
To get the right crumble, save some of your shortbread dough. You want it to be sandy but a bit clumpy. Here are some tips for texture:
- Use cold butter cut into small cubes
- Mix with your fingertips until it’s like coarse breadcrumbs
- Avoid over-mixing to keep it soft
Strategic Topping Distribution
When making cherry crumble bars, spreading the topping evenly is key. Sprinkle it over the cherries gently. You want a mix of big and small pieces for texture and looks.
Achieving Golden Brown Perfection
The trick to a stunning topping is baking at the right temperature and time. Bake at 350°F for 30-35 minutes. Look for these signs:
- Edges lightening to golden brown
- Crumble topping getting crisp
- Cherry filling bubbling at the edges
Let the bars cool completely. This lets the topping set and get crunchy.
Step-by-Step Baking Instructions
Making homemade cherry bars needs precision and care. Follow these expert baking tips to make a perfect dessert every time.
First, preheat your oven to 350°F (175°C). Getting ready is important for these tasty homemade cherry bars. Choose a 9×13-inch pan with 2-inch high sides for even baking.
- Spread the prepared shortbread base evenly in the pan
- Carefully distribute the cherry pie filling across the base
- Sprinkle the crumble topping uniformly
- Place the pan in the center rack of the preheated oven
Baking times can vary based on your pan size. For a 9×13-inch pan, bake for 35-40 minutes. If using a 15×10-inch pan, bake for about 30 minutes.
Look for signs of doneness: the top should be golden brown, and the edges will pull away from the pan. Pro tip: Insert a toothpick into the center – it should come out clean with just a few moist crumbs.
After baking, remove the pan and let the bars cool completely on a wire rack. This step is important for the bars to set and make cutting easier. Don’t rush this step to avoid crumbly, messy bars.
- Total prep time: 20 minutes
- Total bake time: 25-40 minutes
- Cooling time: 1-2 hours
Your homemade cherry bars are now ready for the final glaze or can be stored for later enjoyment!
Adding the Sweet Glaze Finish
The final touch that makes your cherry pie squares irresistible is a perfectly crafted glaze. This sweet drizzle not only makes your cherry hand pies look better. It also adds an extra layer of flavor that makes your dessert unforgettable.
Glaze Consistency Tips
Creating the ideal glaze is all about balance. Start with 1 cup of powdered sugar as your base. The secret to the perfect consistency is adding liquid slowly:
- Begin with 2-3 tablespoons of milk
- Whisk thoroughly to remove any lumps
- Add milk in small increments until you reach a smooth, pourable texture
Drizzling Techniques
For a professional-looking finish, follow these expert drizzling methods:
- Allow bars to cool completely before glazing
- Use a spoon or piping bag for precise application
- Move your hand in a quick, back-and-forth motion for even coverage
- Let the glaze set for 10-15 minutes before serving
Pro tip: For added flavor, mix in a drop of vanilla or almond extract to your glaze. This small touch can elevate your cherry pie squares from good to absolutely spectacular.
Storage and Make-Ahead Tips
Your delicious cherry baked goods need the right storage to keep their amazing taste and texture. These cherry pastry treats can stay fresh and tasty for days or even weeks with simple storage tips.
For short-term enjoyment, room temperature storage is ideal. Keep your cherry pie bars in an airtight container for up to 3-4 days. This way, they stay soft and full of flavor. If you want to keep them longer, refrigeration is the best choice.
- Room Temperature: Store in a sealed container for 3-4 days
- Refrigeration: Keeps bars fresh for up to 7 days
- Freezing: Preserve for 3-6 months with proper packaging
Freezing is great for long-term storage. Wrap individual bars in plastic wrap, then put them in a freezer-safe container. When you’re ready, thaw at room temperature for about 30 minutes.
Pro tip: If your cherry pie bars feel dry after storage, a quick 10-second microwave warm-up can make them moist again. It brings back that fresh-baked taste.
Recipe Variations and Substitutions
Cherry Pie Bars are super versatile. They let you get creative in the kitchen. You can change flavors or make them fit special diets. These cherry desserts are perfect for making your own.
Alternative Fruit Fillings
Cherry pie filling is great, but you can try other fruits too:
- Blueberry filling for a summer twist
- Peach filling for a sweet, tangy variation
- Apple filling for a warm, comforting flavor
- Strawberry filling for a bright, vibrant dessert
Dietary Modifications
You can make Cherry Pie Bars fit different diets:
- Gluten-Free Option: Use gluten-free flour instead of regular flour
- Vegan Adaptation: Swap butter for coconut oil and flax eggs for regular eggs
- Use less sugar or try different sweeteners
- Add nuts to the topping for extra crunch and nutrition
Trying different Cherry Pie Bars is fun! Each change adds a new twist to this favorite dessert. So, there’s a version for everyone, no matter their taste or dietary needs.
Conclusion
Your homemade cherry bars journey ends with a delightful culinary achievement. This easy cherry bar recipe shows that gourmet treats can be made at home. With just 30-35 minutes of prep, you can make a dessert that looks and tastes like it was made by a pro.
These homemade cherry bars are perfect for any occasion. They’re great for family gatherings, potluck desserts, or just when you want something sweet. The mix of buttery shortbread, rich cherry filling, and sweet glaze will wow your friends and family.
We encourage you to try different fruit fillings or add your own twist. Baking is all about creativity and personal expression. Share your experiences and results with other bakers. Your unique take on these cherry bars might inspire others to start their own baking journey.
The joy of baking is in the process, not just the final product. So, preheat your oven, gather your ingredients, and enjoy making these incredible cherry bars!
FAQ
Can I use fresh cherries instead of canned pie filling?
Yes, you can use fresh cherries. Pit and slice about 3 cups of cherries. Mix them with 1/4 cup sugar, 2 tablespoons cornstarch, and a splash of lemon juice. This makes a homemade filling perfect for Cherry Pie Bars.
How long do Cherry Pie Bars stay fresh?
Store them in an airtight container at room temperature for 3-4 days. Refrigeration can extend their life to a week. For freezing, wrap them in plastic wrap and foil for up to 3 months.
Can I make these bars gluten-free?
Absolutely! Use a gluten-free flour blend for baking. Make sure it includes xanthan gum or add 1/2 teaspoon per cup of flour for texture.
What other fruit fillings work well in this recipe?
Many fruit fillings are great. Try blueberry, raspberry, apple, or peach pie fillings. They offer a unique twist on Cherry Pie Bars with the same shortbread base and crumble topping.
Can I make these bars ahead of time for an event?
Yes! Bake them 1-2 days before your event. Store them in an airtight container. Glaze just before serving for a fresh topping.
Are there any vegan modifications for this recipe?
For vegan Cherry Pie Bars, use coconut oil or vegan butter instead of butter. Replace eggs with a flax egg. Make sure your pie filling is vegan-friendly.
How do I prevent the bars from becoming soggy?
Pre-bake the shortbread crust for 15 minutes before adding the filling. This helps keep it crisp. Also, drain excess liquid from the cherry filling.
Can I add nuts to the crumble topping?
Definitely! Chopped almonds, pecans, or walnuts add crunch and flavor. Toast them lightly for a nuttier taste and texture.